Hello and happy Wednesday friends! How’s your week going? Mine has been rather slow-moving, as I am currently recovering from a nasty bug I picked up on Mother’s Day which progressed into pneumonia. Yeah. Pneumonia. Tons of fun, lemme tell ya. Seriously, who gets pneumonia?! Who am I… a 73-year-old chain smoker?!
(P.S. I’m not.)
Well, today I’m happy to report that I’m on the mend and super excited to team up with Royal Design Studio for a new stenciling project! You might remember my first Royal Design Studio experience when I aged 100 years in one day stenciled a drop cloth and turned it into a curtain.
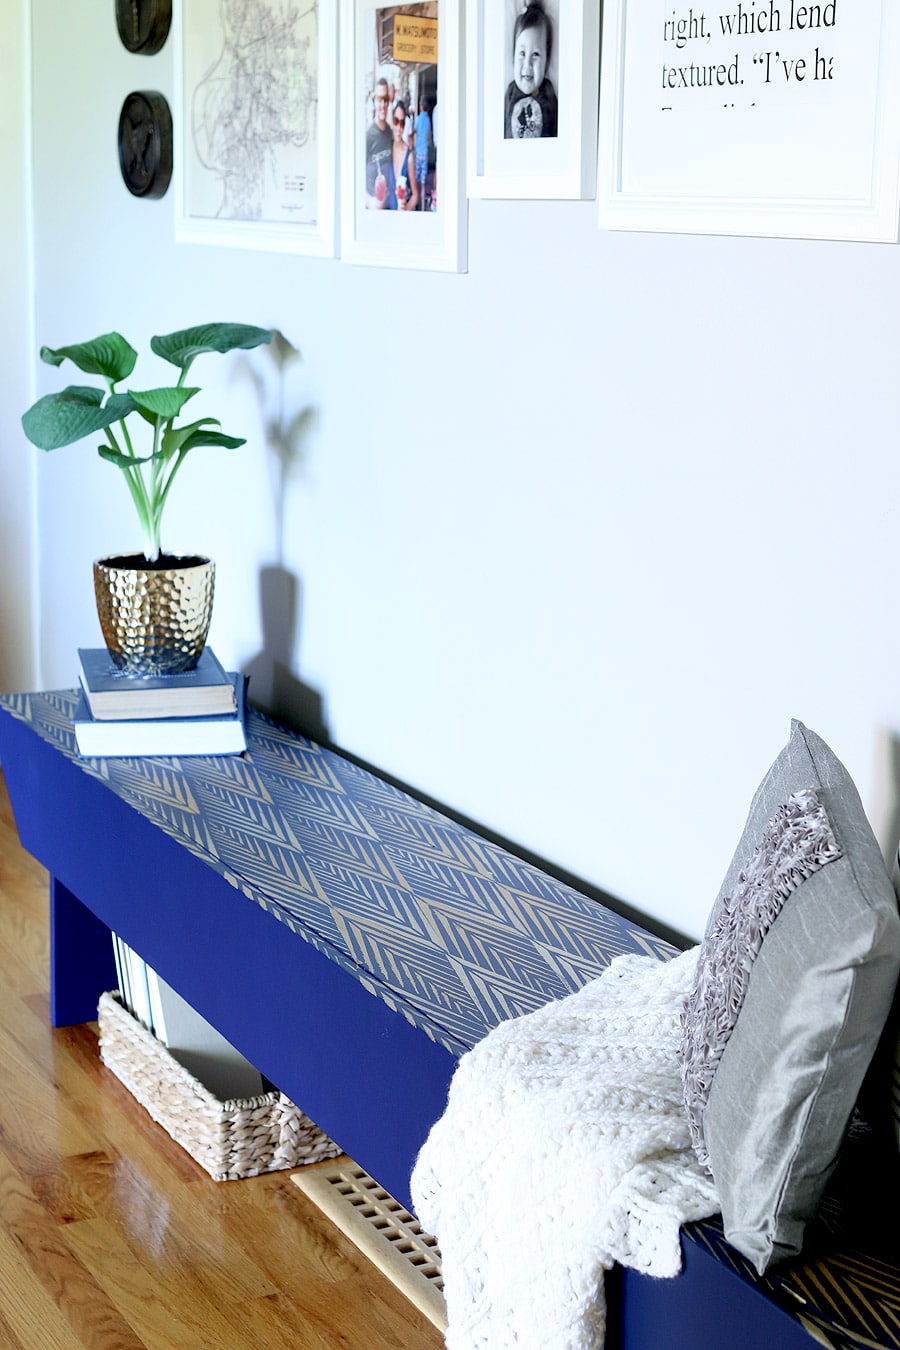
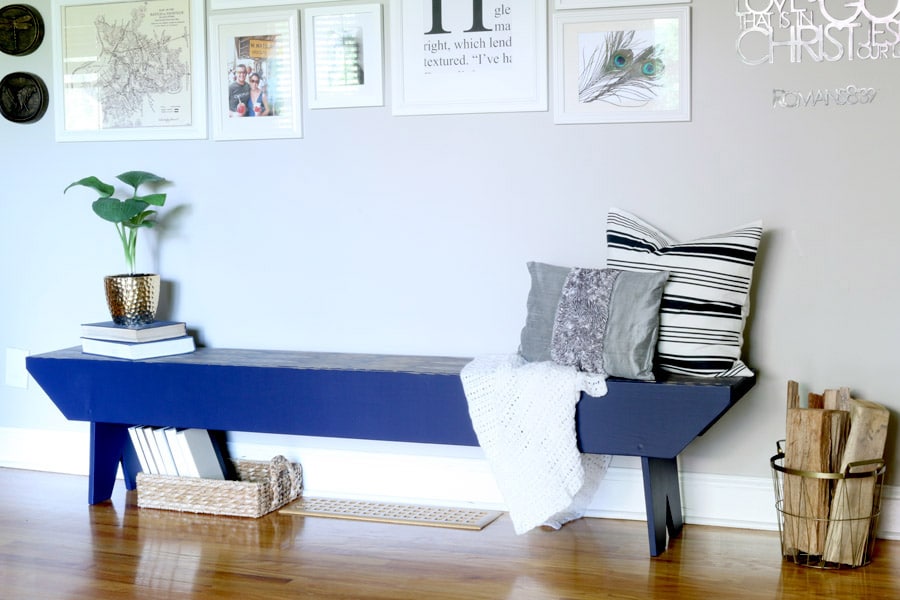
When I was tossing around ideas on what to stencil for this project, I kept coming back to the DIY Pottery Barn-inspired bench I built last year. I’d stenciled it back then, but was never really happy with it. Wrong colors, not enough contrast… I can’t be sure what went wrong, but whatever it was, it was a misfire.
 So I decided to revisit this bench business and I’m so glad I did. Here’s how it turned out:
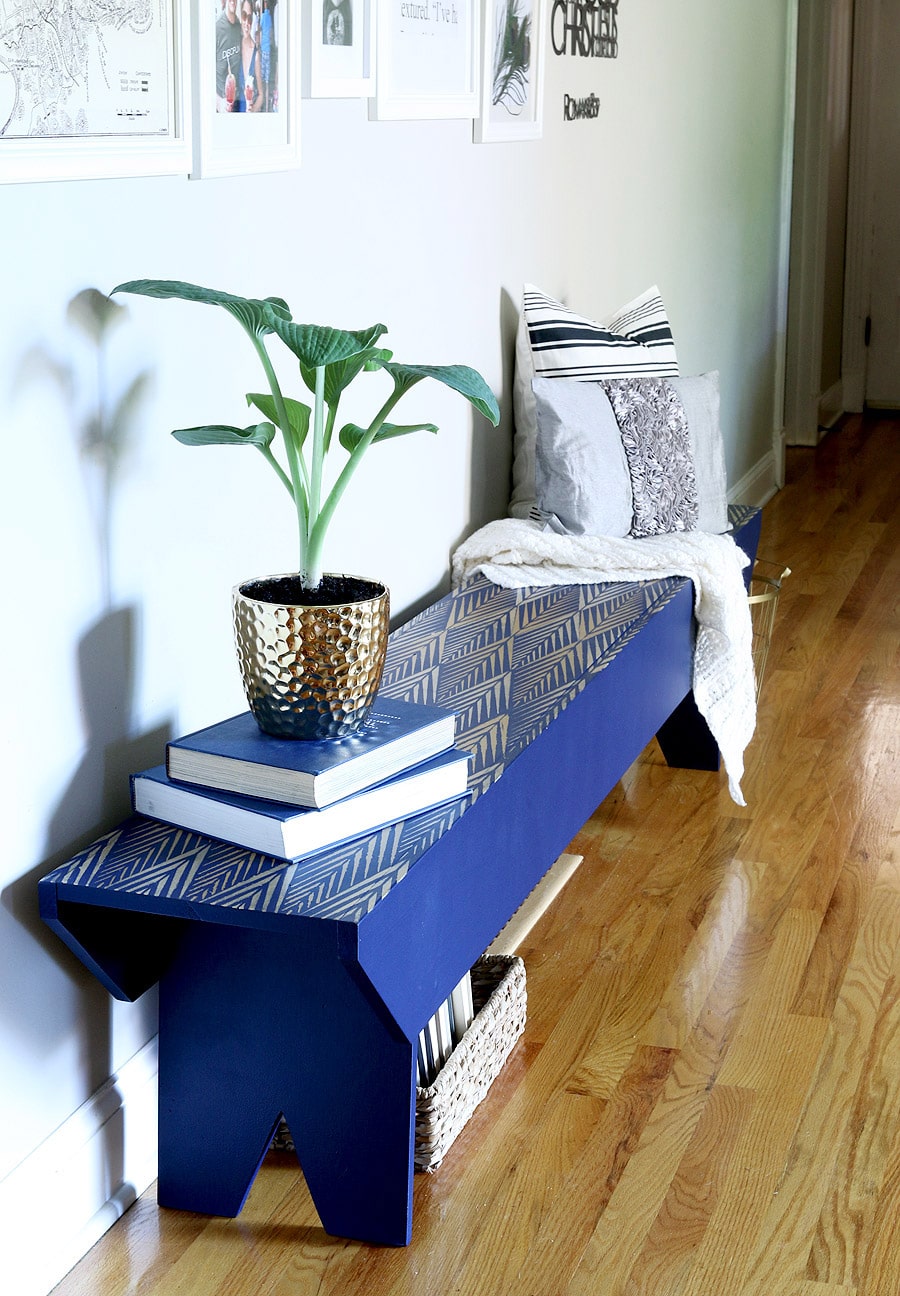 Oh, and it’s definitely worth mentioning: this bench cost about $35 to build and I only used three boards! My sweet friend Ana White kindly drew up the plans so you can build it for yourself. Pretty rad, right?
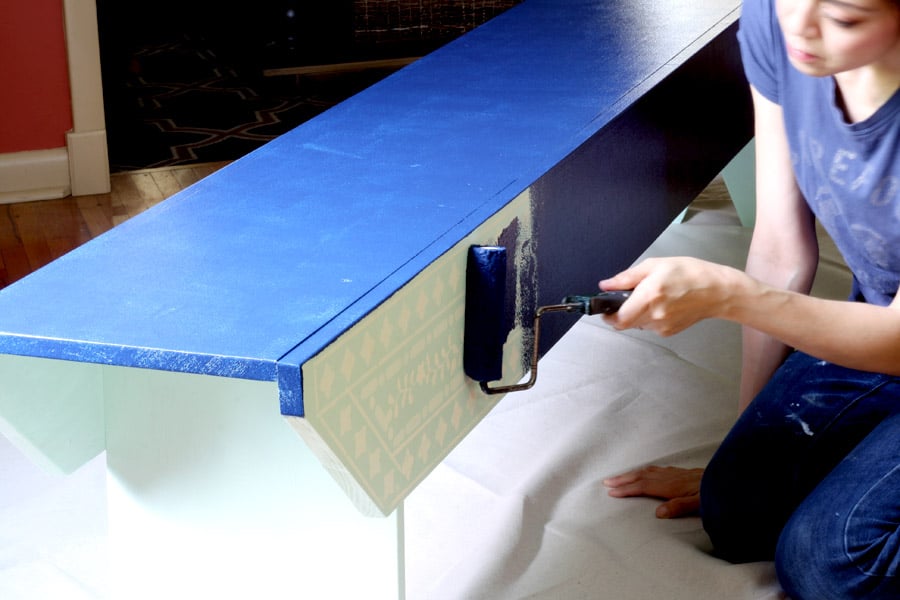
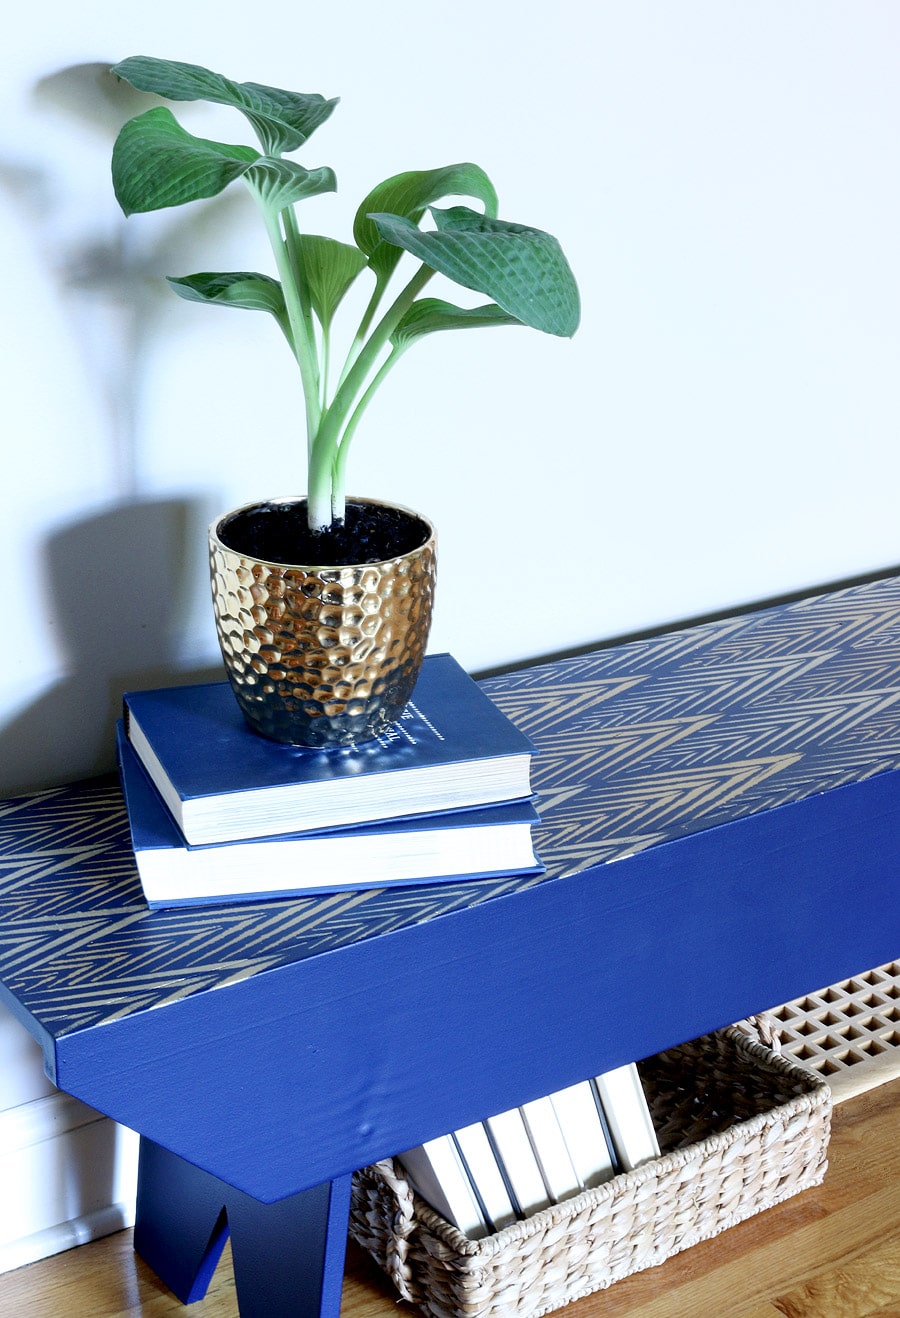
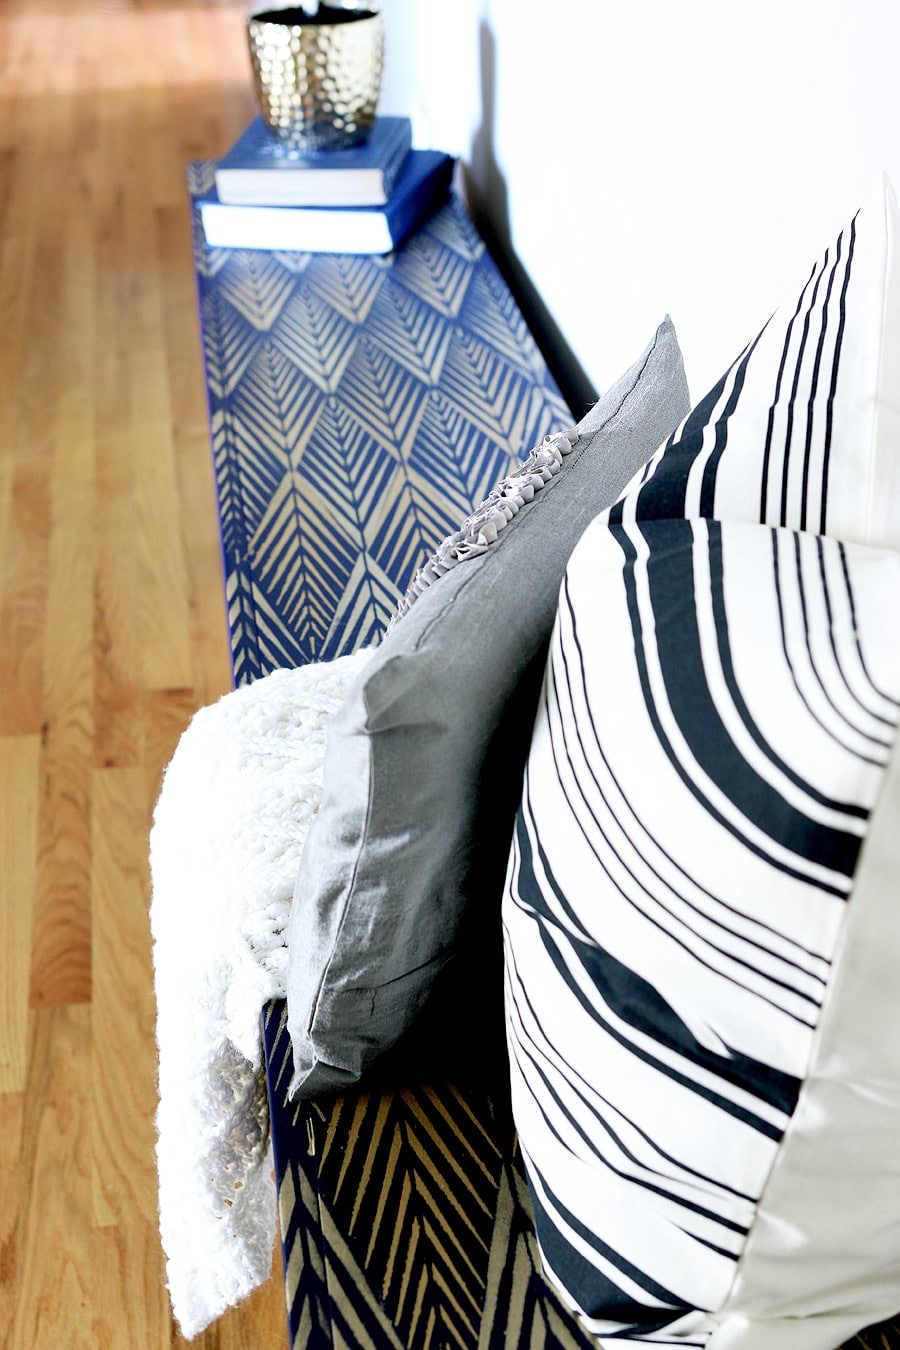
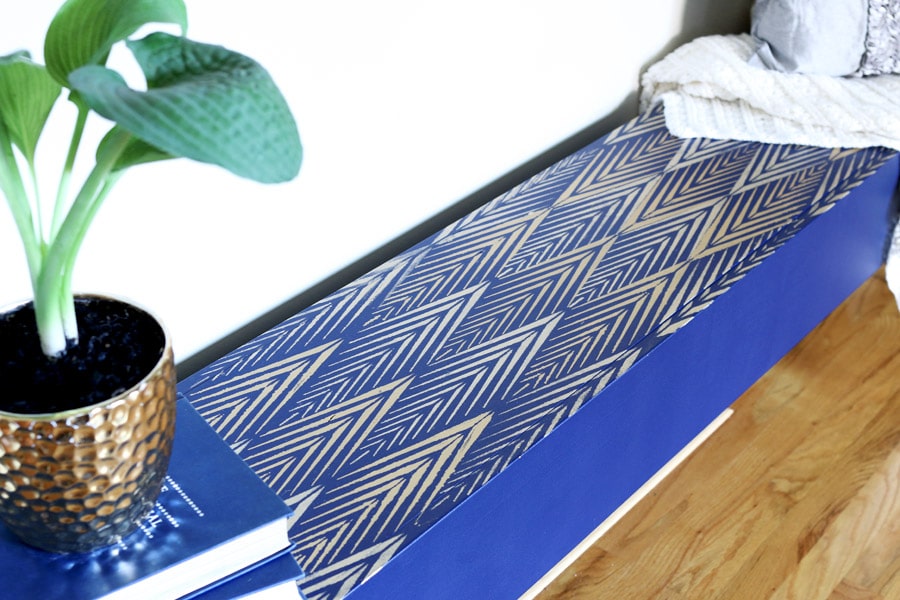
I’ve long had a love affair with navy and gold, so I decided to start there. I painted the bench in Old Navy by Benjamin Moore. Isn’t this the most perfect navy blue you ever did see? I rolled on two gorgeous coats of this deliciousness.
*This post contains affiliate links. To read my full disclosure policy, click here.
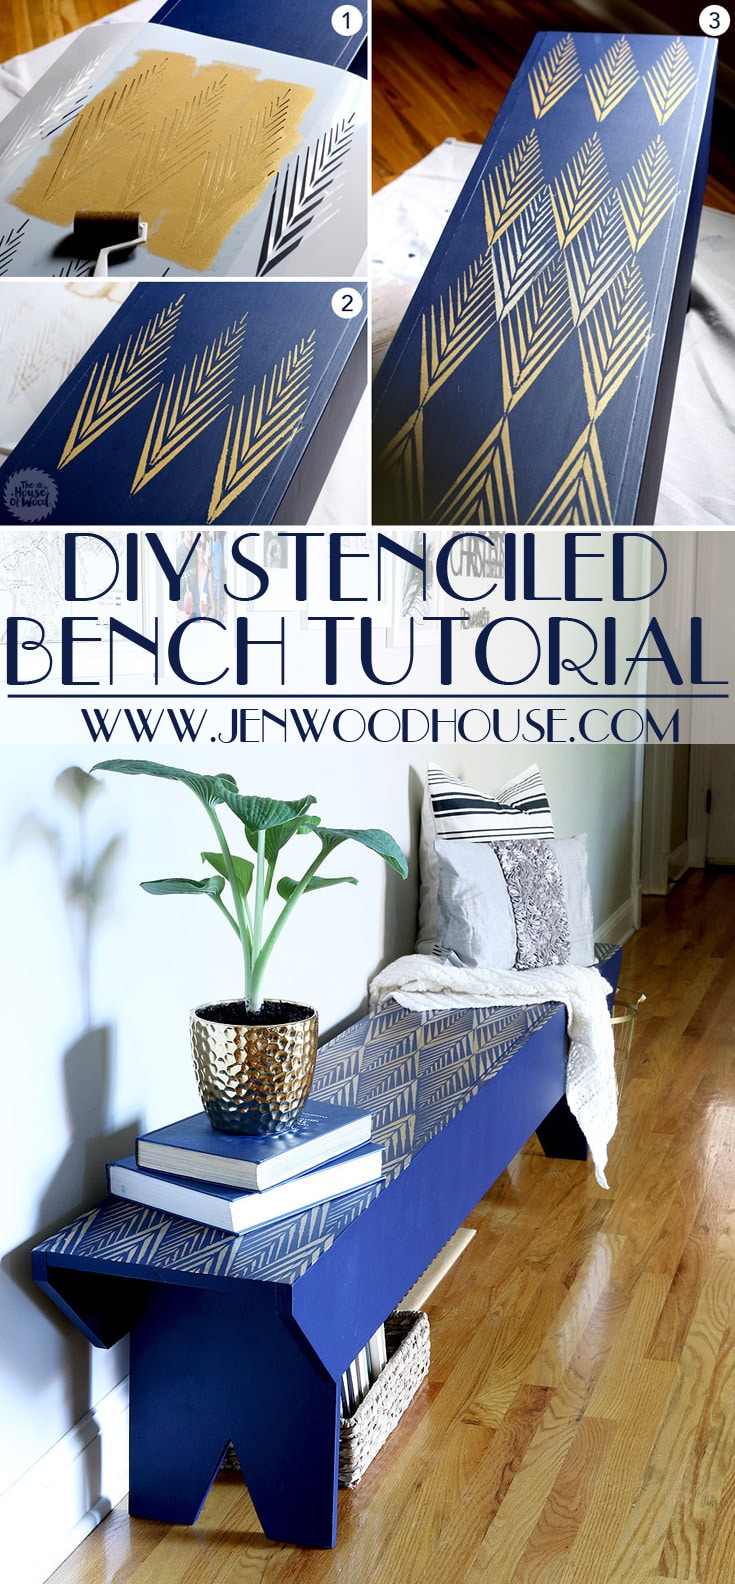
 After the paint had dried, it was time to stencil! I was going for a bit of art deco glam, so I used two different shades of gold for the stencil. I love this stencil – it’s called the African Plumes Stencil by Royal Design Studio.
I applied a light coat of spray adhesive on the back of the stencil, positioned it, and rolled on the first shade of metallic gold paint. First, I used Glorious Gold by DecoArt then followed up with Metallic Gold by Martha Stewart.
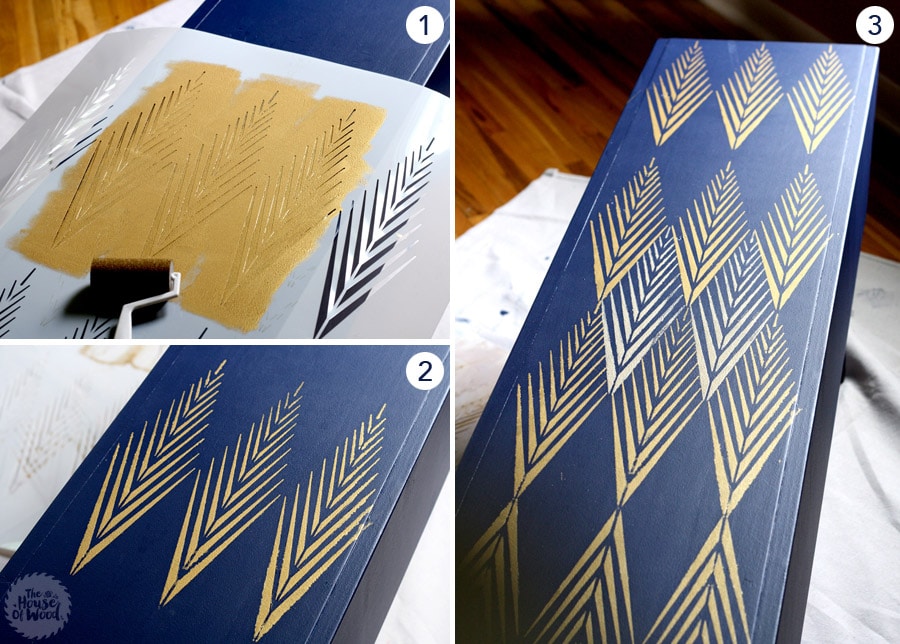 I cleaned the stencil off after each use to keep the paint from gobbing up. Also, after dipping my roller in the paint, I’d give it a couple rolls on the drop cloth to get rid of the excess. I also kept reapplying the spray adhesive to the back of the stencil to decrease the risk of bleed-through. Even after taking these extra measures, there are parts of the bench that are uneven, so the lines aren’t razor-sharp precise. Surprisingly, the perfectionist in me isn’t annoyed about this. The stencil is really forgiving and the bench still turned out beautifully. I just love navy and gold together, don’t you? I’m crazy about it.
 What do you think? Have you stenciled anything lately? I’d love it if you pin and share this project by clicking the ‘Pin It’ button on the image below. Thanks for visiting, have a lovely rest of the week!
*This post is sponsored by Royal Design Studio. I received product and/or compensation for this post, however I was not told what to write nor what project to complete. All efforts, happy dances, paint in my hair, and opinions are my own.
The post DIY Stenciled Bench appeared first on The House of Wood.